

Read More

Recognized for AI Excellence at 2026 Globee® Awards - Read More
Mobile App Development
Updated: Apr 21, 2026
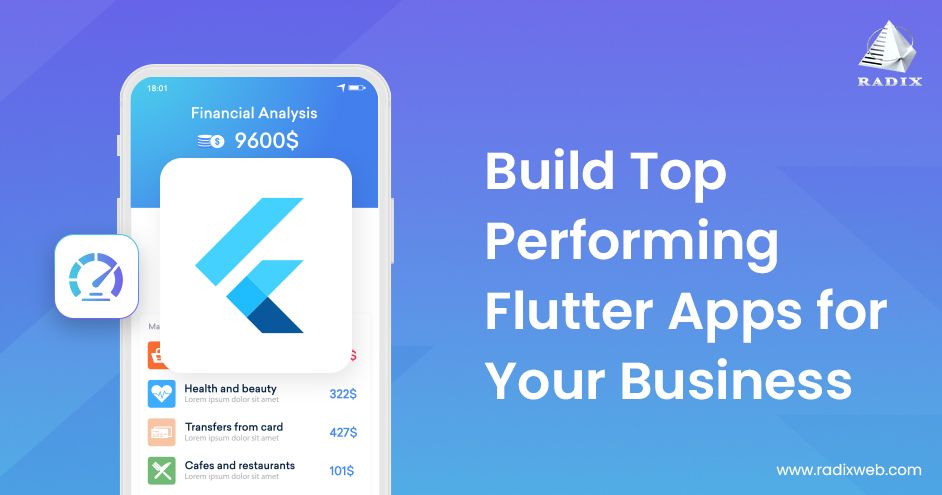
Build Bold, Beautiful, and Breakthrough Mobile Apps with Flutter App Development Services
Verified Expert in Mobile Architecture & Strategy
Quick Recap: Indeed, Flutter has taken the app development world by storm. Its ability to create stunning, high-performance apps for both iOS and Android from a single codebase is revolutionizing the industry. Read on to discover how Radixweb leverages Flutter's power to build breakthrough mobile experiences. Learn about our proven process, cutting-edge tools, and successful projects. We'll reveal why choosing Radixweb as your Flutter development partner is the key to your app's success.
Flutter. Flutter. Flutter.
You might have heard the word ‘Flutter’ zillions of times in this software development industry. Some experts claim Flutter to be the future of app development, whereas others claim it to be the most promising framework ever.
Some developers say Flutter application development can be used to build top-notch, award-winning applications, while others find Flutter development a breeze. And the praising list goes on, and you can add more to it as well.
As a Flutter app development company, we would not disagree with what you say! After all, Flutter is gradually gaining popularity and winning the hearts of the dev community. The popularity of the Flutter framework defines that Flutter is the best mobile app development framework in recent times. Therefore, many big giants like Alibaba, Google Pay, Groupon, and Hamilton have embraced the technology and dominated the mobile app development world.
Now, you must be wondering, why Flutter? Why has Flutter created so much buzz?
Let us tell you that Flutter is a cross-platform framework used to build an app across devices using a single code base. The most interesting part of this framework is that it allows developers to write one code for one platform. And using a single codebase, developers can build Flutter apps for multiple platforms – Android, iOS, Windows, Fuchsia, and Linux with rich native interfaces.
As we are writing a long note on Flutter, I guess hundreds of other new Flutter applications have already been launched in the global market.
So, if you have any Flutter project ideas and plan to build a Flutter app, we suggest you not to wait anymore. If you wait, there are higher chances of getting out of the competition. Better try to connect with our Flutter experts. As an experienced cross-platform mobile app development company, we will hear your project ideas and give you the right direction to reach the peak of success.
So, now you have a project idea to build an app (we assume that), but don’t know where to start from? Not aware of the benefits of Flutter app development? Not sure how to choose the best Flutter app development company? And last but not the least, how much does Flutter app development cost?
Worry not.
The actual motive of writing this piece of content is to cover all your queries and land you with the best Flutter developers for hire within 48 hours.
Let’s start with a brief introduction to Flutter for your better understanding.
On This Page
- What is Flutter App Development?
- Flutter Mobile App Development to Build an App That Allures and Retains User Attention
- Our Process of Flutter App Development
- How We Make Flutter Apps Differently?
- Tools and Technologies Used in Flutter App Development
- Some Mobile Apps We Delivered
- Some Popular Apps Built with Flutter
- When to Choose Flutter for App Development?
- Advantages of Working with the Best Flutter Development Company
- A Note from Radixweb – Suggestion
- Why Radixweb is a Leader in Flutter Development Industry?
- Discuss Your Needs with Us
Cross-platform mobile app development made super easy with Flutter, an open-source software development kit. One Codebase to build top quality natively compiled apps for iOS and Android.
What is Flutter App Development?
Flutter is an open-source, cross-platform development tool that uses Dart as a primary language developed by Google. It provides everything under one roof. It enables developers to build feature-rich apps that give a native-like feel for multiple platforms.
In short, Flutter app development is one type of process which allows Flutter developers to build cross-platform applications for all devices using a single codebase.
Since Flutter is an open-source framework, any developer can be a part of the community on GitHub.
Flutter recently launched a new version – Flutter 3.3, which became the talk of the town. Moreover, we also covered everything about recent releases of Flutter in our Flutter 3.3 and Flutter 3.0 blogs.
Welcome to Flutter
Dart – a programming language used by Flutter, has a smooth learning curve. Therefore, our Flutter developers can create a single codebase and use it across multiple platforms. This feature enhances our developers’ productivity and allows them to build Flutter applications faster.
Therefore, as a business owner, you must know what Flutter is and why Flutter is better to make the most of the benefits of Flutter app development. And if you are eager to know Flutter concepts and build your first Flutter app, you can always connect with our top Flutter developers.
You Name the Idea, We Bring It to Life!
Consider Flutter
Flutter Mobile App Development to Build an App That Allures and Retains User Attention
Flutter mobile app development is one type of process that allows developers to build natively compiled, multiplatform mobile apps using a single codebase.
As a startup, when you go for mobile app development, you have two options to choose from – native app development and cross-platform app development.
On the brighter side, you can leverage many benefits if your developed application is compatible with every platform – iOS, Android, Windows, and Linux. Therefore, developing a cross-platform application will help you get there.
In our opinion, Flutter, a cross-platform app development framework, is promising for app development, be it Flutter mobile app development or Flutter web development. On average, in a month, we receive almost 80 inquiries and applications from startups from the USA, UK, Europe, Canada, and Australia about Flutter mobile app development. Therefore, our developers are always on their toes to build their dream app on budget and time.
Development Cost at Lower Rate
While talking about native app development, it can be an expensive option for you (startups) as developers need to write different codebases for different operating systems.
On the other hand, cross-platform apps offer a single codebase feature, which allows Radixweb’s developers to create code for an application that works well on various platforms. This results in minimizing the developer’s efforts and maintenance costs of the application.
Development at Speed
Cross-platform development allows developers to speed up the pace of app development for multiple platforms. Due to the single codebase features, developers don’t have to rewrite the code from scratch to build an app for various platforms. Hence, it delivers the product in a shorter time than the native-app approach.
Words from Top Leaders: Flutter significantly reduced the time we needed to develop new features, from 1 month down to 2 weeks. - Bruce Chen, Senior Development Engineer at Alibaba
Testing in Less Time
When you go for Flutter mobile app development services, you don’t have to hire app developers who are proficient on two different platforms. A Flutter app developer for hire from Radixweb will create your first Flutter app as per your requirements. Therefore, our QA experts will have to test only one app version. As a result, it helps in saving time for app testing.
Faster Time to Market
As our developers build your Flutter business app in less time than native app development, you can quickly launch the app in the market. This helps you create a strong first impression and take full advantage of the market.
Ease of Code Integration
When it comes to embedding code in an existing platform or collection of applications, Flutter is incredibly flexible. Our developers will find it easy to implement a new code into an application code due to its flexibility. SDKs we use are extremely beneficial to development, and we take advantage of them.
Flutter is the future of Mobile Application Development!
Our Process of Flutter App Development
Flutter is a great framework for startups with a very limited budget and time. Flutter is a savior when your top priority is aesthetic design and engaging UX. In order to deliver uninterrupted customer engagement on your application and fulfill your business objectives, we follow a robust development process in which your application passes through several parameters. Our development process ensures your app is error-free and integrated with all required features.
Product Idea and Conceptualization
As we know, every startup is unique and has its own unique ideas and requirements for app development. Hence, at Radixweb, we conduct several rounds of discussion with you to prepare the concept for the idea and come up with the right business model and project estimation.
We will analyze the interest of your end-users in order to meet their expectations in the application.
- Idea Conceptualization
- Research and Planning
- Project Requirements and Estimations
- Establishing Protocols for Communication, Escalation, Review, and Sign Offs
Architecture Design and Prototype
In this stage, we do market research, prepare documents, and test alternative architectural techniques to balance various architectural qualities. User experience requirements, intuitive and pleasant design, aesthetics, and practical functioning are all taken into consideration while creating user interface designs.
- Wireframes Development
- Prototype Design
- Choosing the Right Development Platforms and Structures
- UX Personalization
Development
Once we are done with project conceptualization and design, our dedicated team, consisting of a Project Manager, Business Analyst, Designers, Developers, and QA, will work collaboratively to build the application based on your needs. We also use various project management tools like Bugzilla, JIRA, and AceProject as a part of our Flutter app development process.
- Code Creation
- Code Optimization
- Launch Plan
Words from Top Leaders: Even the night before we went live, we were able to make improvements and feel pretty good about them. In fact, the day before we launched, we uploaded a completely new feature to the App Store. That’s what the beauty of Flutter is! - Jessica Cantore, Product Manager
Quality Assurance
Once the app is developed, our professional testing and QA team check your application for quality assurance throughout the entire software development life cycle. In fact, our QA team works closely with our development team.
- End-to-End Functional Testing
- Bug Finding and Resolution
Launch and Optimization
After the completion of the application, our Flutter developers deploy your application on your preferred platform by adhering to their guidelines. We strive to improve the product based on customers’ or stakeholders’ feedback.
- Product Launch
- Maintenance and Support
Looking for Vetted Developers Who Can Build a Flutter App That Makes a Difference?
Hire Developers
How We Make Flutter Apps Differently?
With many years of experience in Flutter app development services, we follow some of the best approaches to build the finest, next-gen application.
User-First Approach in UI/UX
We use the expressive and adaptable UI of the framework to design Flutter apps. Our designers offer a native user experience that encourages engagement by combining conditional UI with animations.
Native-like Performance
Flutter = native real-time app (in terms of performance).
Our mobile app developers for hire use Dart and Flutter widgets to deliver native performance with 60 fps or 120 fps performance on both Android and iOS mobile platforms - capable of 120Hz updates.
Here, one Flutter expert made a note of its performance with given stats and data:
- 40% reduced CPU and GPU usage for simple iOS animations
- 20% to 30% increased speed for the default navigation
- 70% reduced memory in fast scrolling through large images
Test-Driven Development
Our developers use Flutter's debugging and inspection features during app development and follow a well-defined, test-driven methodology. After that, the QA team uses the best testing tools for quality assurance of the app.
Scalable and Future-Ready
We aim to deliver a scalable app. Our Flutter programmers create a reliable architecture so your Flutter application runs seamlessly even in heavy traffic. Whether adding new features or compatibility with the most recent hardware and software, we build apps with future upgrades in mind.
Tools and Technologies Used in Flutter App Development
Flutter offers an amazing set of widgets that are fast, customized, and appealing. This is what makes Flutter the best UI framework in recent times.
Flutter consists of two important components:
- A widget-based UI library: A large group of UI components, including reusable sliders, buttons, and text inputs, that may be used to meet your application's needs.
- A self-sufficient SDK: It includes development tools for your app development.
If you are eager to know which tools we use to enhance the app development process for the Flutter app, allow us to list the top Flutter development tools.
Panache
Panache is a Flutter‑focused Material theme editor that lets developers and designers create custom app themes visually. It exposes colors, shapes, and typography as sliders, then generates clean Dart theme code you can plug into your Flutter app for polished UIs.
Codemagic
Codemagic is a Flutter‑native CI/CD platform. It automates the entire process of building, testing, and releasing Flutter apps for iOS, Android, and web. It also integrates with GitHub and GitLab, runs unit and integration tests, and deploys to stores with minimal configuration.
Appetize
Appetize is a cloud‑based emulator that lets you run and test Flutter and native mobile apps in a browser. It simplifies demos, QA, and customer support by providing instant access to live app instances. You don’t need local device setup.
Android Studio
Android Studio is the official IDE for Android development and a cornerstone for Flutter. It offers robust tooling, debugging, and profiling. Its Flutter and Dart plugins provide code completion, widgets inspector, and hot‑reload support, all of which streamlines cross‑platform app development.
Supernova
Supernova bridges design and code by turning Figma, Sketch, or Adobe XD designs into Flutter‑compatible components and code. It syncs design systems into Flutter so UI changes stay consistent on the codebase and design tools.
Adobe Plugins (Adobe XD for Flutter)
Adobe XD plugins for Flutter convert design files into Flutter‑ready code. As such, handoff from designers to developers gets easy. They generate widgets and layout snippets that align closely with the visual comp.
Firebase
Firebase offers a suite of backend services like authentication, Firestore, Cloud Functions, Cloud Messaging, and analytics – all of which can be tightly integrated with Flutter. It enables rapid feature rollout (user auth, real‑time data, push notifications) without managing infrastructure.
RevenueCat
RevenueCat simplifies in‑app purchases and subscriptions for Flutter apps for iOS, Android, and web. It handles receipt validation, subscription lifecycle management, and cross‑platform sync.
Count.ly
As an open‑source mobile analytics and engagement platform, Count.ly tracks user behavior, crashes, and performance in Flutter apps. It provides dashboards and funnels to optimize retention, feature usage, and conversion paths.
Test Magic
Test Magic is a Flutter‑oriented testing and deployment helper. Developers use it for easy screenshot collection, bug reporting, and feedback loops. It also streamlines QA workflows by letting teams gather visual evidence and context.
Some Mobile Apps We Delivered
Radixweb has been utilizing the Flutter platform for app development since its creation – 2017. Until now, we have developed various complex Flutter apps for different domains with multiple functionalities.
As a renowned tter mobile app development company, it’s not possible for us to display all the work we have done here due to the NDA agreement and hundreds of projects. Hence, we are displaying some real-time examples of developed mobile apps, which completely changed their business process and witnessed increased revenue.
1) Organic Eateries
Business Model
Fixed Cost
Country or Region
UAE
Requirement - The client was based in the UAE and was very well-known in the food and beverage industry. They had a vision of recreating and enabling families and people to enjoy their favorite restaurant dishes at home. Therefore, they started selling the kitchen and food items by tying with the restaurant. But in this digital world, they wanted to leverage the digital platform’s potential; thus, they consulted Radixweb to build a seamless mobile application for all platforms.
Result - We decided to build the front-end with Flutter. As Flutter has a rich user interface and modules, it is the most effective platform to get a head start. We created a feature-rich app for food products and kitchen equipment by integrating all features and functionalities. The core goal of expanding their business has now been accomplished with the eCommerce mobile solution.
Client Words - Because of the great success of this project, we are very much delighted. Hence, we have offered a similar kind of project, and still, we’re working with Radixweb for business. The application fulfills all requirements - easy to install, highly technical, and accurate. Its efficacy is based largely on their contributions.
2) One Stop Online Shopping Solutions
Business Model
Fixed Cost
Country or Region
Europe
Requirement - The client was looking for stable Flutter mobile app development services to sell his wide range of clothing products. He desired to have an online store solution to promote the products and manage his orders and customers. They asked for the integration of third-party software to improve marketing efforts and the payment collection process.
Result - Our team of Flutter experts has developed an online shopping cart solution that helps clients sell their products through online applications, generate good traffic for the website, and promote their business effectively around the world. We have offered custom development by integrating Korta Payment Gateway Plugin in the solution on client's demand.
Client Words - Radixweb has proven to be a reliable and capable software vendor for several years. Every team member from my project is accessible at all times, and they communicate well through various channels.
3) Integrated Ecommerce for LMS
Business Model
Dedicated Development Team
Country or Region
USA
Requirement - The client's need was to build a new E-Commerce website and integrate it with its Learning Management System to enable its users to access information. The core objective was to develop an eCommerce LMS Solution with a great look and feel and a robust backend panel to manage all commercial activities.
Result - An easy-to-use interface of the eCommerce LMS Solution allowed the end-users of the client to procure the educational material without much hassle. Easy filtering of the products and content management were key client benefits. Overall, the learning management system was allowed to function seamlessly.
Client Words - Radixweb’s delivery time is shocking. They were faster than us. They contribute ideas, but they’ll follow through on your ideas and goals. Their communication is amazing.
Bring Your App Idea to Life with Flutter MVP Development
Check Out Our Case Studies
Some Popular Apps Built with Flutter
Flutter application development aided in the creation of many modern applications with its novel SDK and feature-richness. The Google team claims that businesses of all sizes around the world are building with Flutter. Therefore, Flutter has given enough information on its Flutter Showcase page that big giants have used Flutter for their app development.

Let’s take a closer look at these unique applications.
- Google Pay
- Xianyu by Alibaba
- BMW
- eBay Motors App
- Hamilton
- Dream11
- Cryptograph
| Industry | Applications |
|---|---|
| Social Media | KlasterMe, Pairing, In10, Meeve, N8, Baidu |
| Shopping | Xianyu, HuYu, Motors, Grab |
| Entertainment | Hamilton, MostMuse, Topline, Music Tutor, InKino, Stadia |
| Fitness and Health | Perfectly, Watermaniac, Insight Timer |
| Finance and Business | Criptomaniac Pro, Google Ads, AppTree, Abbey Road Studios, Groupon, Greentea |
When to Choose Flutter for App Development?
While Flutter and React Native are popular platforms for mobile app development, let us give you an idea of when you should choose Flutter for app development.
When you want to design a complex UI: Flutter application development is used to build complex, feature-rich, amazing user interfaces without compromising on performance. So, if your final objective is to create an impressive interface, then Flutter should be your option for app development.
When you want to launch an app very soon: Flutter UI framework enables you to build the application extremely fast as per your needs. In addition to being a cross-platform SDK, it also contains a builder tool and numerous usable UI widgets. As a result, developing, testing, and issue-fixing all happen quickly with Flutter mobile app development.
When you want a high-performing app: Flutter is faster and performs better than React Native because it doesn't use a JavaScript bridge. Apps created with Flutter have been working smoothly without any lags. If performance and speed are important to you, use Flutter to create your application.
Watch this video to understand how our developers follow their approach and build a high-performing app.
Flutter performance tips - Flutter in Focus
Save Up to 60% of Development Cost with Us
Let's Flutter
Advantages of Working with the Best Flutter Mobile Application Development Company
In many parameters, Flutter wins against its competitors and offers multiple advantages. Therefore, while choosing the Flutter mobile app development project, you must choose an experienced service provider who can make the most of the benefits of Flutter and provide you with the best product solutions.
Let’s consider some benefits you can leverage while choosing and working with the best Flutter mobile application development company, like Radixweb.
One Code for Multiple Platforms
Since Flutter consists of multiple widgets and designs, it is not dependent on any platform. This allows developers to write code for one platform and use it for multiple. It means, if you write a codebase for the Android platform, you can use it for iOS and Windows devices as well. This reduces the cost of hiring a developer for iOS and Android services.
Faster Code Writing
Did you hear the coolest feature of Flutter? It’s Hot Reload. This enables developers to build faster and more dynamic apps due to faster reloading.
What makes it cool is it allows developers to view changes instantly in the app when they change something in the code.
Amazing Design
Design is an essential part of an application that grabs millions of users’ attention. And, Flutter never fails to stand strong in this parameter as well. Hence, Flutter offers a customization option for widgets, allowing developers to create customized or own widgets for their applications.
The final outcome developers deliver with customized widgets is appealing and as beautiful as the native apps.
Minimum Viable Product (MVP)
Flutter is the right pick for your app development project if you wish to build an MVP of your application to showcase to stakeholders or users how it will look.
Internationalization
Google strongly supports diversity and inclusivity, and Flutter offers built-in options to make your apps more user-friendly.
If you want a multilingual app, you normally need to prepare your code for localized content, which is typically developed later. It is known as internationalization.
This approach is made simpler by the native widgets that Flutter offers, which are based on the Dart International Package. Right now, Flutter offers around 24 languages.
Words from Top Leaders: We actually built the multi-feature app with half of the development team. Each release can now include more features with the same number of developers in the team. - Tim John, Project Manager
A Note from Radixweb – Suggestion
After going through several important points above, you may come across another question – to use or not to use Flutter in app development?
And you could be seeking an answer too. But we know, with around 26 years of experience in mobile app development services, we have seen many technologies coming into the picture and ruling the world for the time being. And In a few years, they disappear with another arrival of technology in the market.
While considering Flutter, despite being a young platform, it has been growing every day and getting popular as well. Moreover, experts are sure that the benefits of using Flutter are much stronger and risks are minimal.
As a final takeaway from our research on Flutter for Business, we would like to give some tips that will facilitate your move to this SDK's more advantageous features:
Discovery Phase
Don't ignore the technical document while planning your project because it serves as an essential road map. The money you have invested is worth it because it is an opportunity to organize everything, examine things clearly without embellishments, and make any necessary corrections.
During the technical document stage, ask yourself questions: Is Flutter the right platform to implement my project’s capabilities?
If your answer is yes, don’t think too much and start your app development.
If you are still in a dilemma in choosing the best platform between Flutter and React Native, then refer to our blog – Flutter vs React Native. You will get your answer there.
App Performance
Are performance and speed your main goals? Flutter will fulfill your requirements and take charge of your project. Many business owners (startups and large organizations) who thought of Flutter solely as a backup choice for their development were mistaken. The majority of them did not regret choosing this SDK as the main engine of their project because the trial-and-error process still guided them to the proper choice.
You should rely on Flutter professionals and consult experienced outsourcing companies while planning to launch your application because they will be able to crack all the deals for you with implementation.
And Flutter is yet another useful platform in this direction.
Your app will take off.
Use Libraries and Widgets
Although there aren't many libraries available for Dart, newbie developers with JavaScript or the C-series languages can quickly create them with external resources. Flutter has evolved as a vast ecosystem with plenty of third-party packages and libraries that suit every color and taste.
Flutter comes with many widgets, which are incredibly attractive and multi-faceted. If your strategy can be summed up by the phrase "it's all about the widget," then you shouldn't consider the disadvantages of Flutter. The final outcome will be more impressive and remarkable than you have thought.
Flutter Support
All developers are in awe of Flutter as it provides better documentation systems. Since Flutter is backed by Google, it has a vast community. This allows developers to communicate with experts on any issue. If you see this as a primary objective, Flutter wins the race here, too. You can leverage all Flutter benefits with the best community support.
Flutter is probably the best platform available now if you aim to build a stunning, high-performance cross-platform application that will satisfy all of your clients' expectations. So, hire Flutter developers and enjoy the financial benefits that you can spend on advertising or partnering with new businesses.
As a result, developing a Flutter application with minimal risks has become very simpler.
We are explaining in this given chart why Flutter is better than other development frameworks available in the market.

Make Your Flutter App Compatible for Desktop
Build a Powerful App
Why Radixweb is a Leader in Flutter Development Industry?
Being into the Flutter industry since its existence, our professional developers say that the best apps made with Flutter are:
- Shopping/eCommerce apps
- Food apps
- Marketplaces
- Social media apps
- health and fitness apps
In fact, we are capable of building any type of application in Flutter. As per our standard, even if something is missing, you can always write the code.
However, we might need to refine some functionality for the two apps individually.
We have created one of the best Flutter apps, which is FitEX.
The app is designed for athletes and those serving in the military. The app's primary objective is to detect the moisture level in the blood to train athletes more effectively.
And based on the collected data in the app, trainers are responsible for modifying workouts and ensuring athletes drink water in time.
Well, our prestigious client chose Flutter app development services as the primary option because of its budget constraints. We developed two apps for the price of one, and we are extremely happy that the final outcome met the requirements of our client.
Discuss Your Needs with UsNow it’s a proven methodology that Flutter development services for mobile app development is the right profitable move for startups. It offers a faster go-to-market and low development costs. So, what are you waiting for?Business owners and startups worldwide are taking advantage of this Flutter opportunity and hiring mobile app development companies, for example, “Flutter app development company near me”, to begin their incredible mobility journey.
Frequently Asked Questions (FAQs)
Is Flutter a good choice for app development?
Is Flutter good for large projects?
How much does it cost to develop a Flutter app?
Is Flutter better than React Native?
How much does it take to build a Flutter app?
Don't Forget to share this post!
About the Author
Vinit Kariatukaran is the VP of Operations & Delivery at Radixweb with over 13 years of experience in mobile application development and enterprise mobility solutions. He specializes in mobile architecture, cross-platform development, and scalable mobile platforms across iOS, Android, and Flutter ecosystems. Vinit leads teams that build high-performance mobile applications using modern DevOps and CI/CD practices to ensure reliability, scalability, and seamless user experiences. Outside of work, he enjoys reading and engaging in thought-provoking conversations with colleagues and friends.


Explore More Topics
Ready to brush up on something new? We've got more to read right this way.
Get top Insights and news from our technology experts.